Search This Blog

Showing posts with label homemade. Show all posts

Friday, December 20, 2013

Cupcakes! Gingerbread and Fruitcake

I baked 185 cupcakes yesterday. 161 mini cupcakes and 24 regular sized. It was madness in my kitchen and at the end of the day it looked like my home had been invaded and only the kitchen had been ransacked. Craziness.

I made cupcakes for two different office parties and they were a huge success at both. I made:
Fruitcake Cupcakes- dried apricots and cherries soaked in booze (brandy and rum) in a molasses and ginger cupcake with walnuts. Topped with Rum buttercream salted caramel and more dried cherries.

I also made:
Gingerbread cupcakes- gingerbread cupcakes with a vanilla custard filling, topped with vanilla buttercream, crumbled gingersnaps and short bread cookies and finished with a white chocolate sauce.

Everything was amazing and I've now knocked off two more recipes from the Robicelli cupcake cook book.

:)M

(I wrote this on my phone, please forgive any typing and layout errors.)

Wednesday, December 11, 2013

My Personal Cooking Challenge

One day, whilst perusing the internets and all the glorious splender that is on the webs I discovered Robicelli's.  To be exact, I was looking around Medium and found some great posts by Allison Robicelli, specifically her write up on jogging.  (Bob and I were joggers for a hot minute, now we are once again sloth-like.)  I discovered I liked all her Medium posts, and immediately started to day dream about us being BFF - I know, super creepy, and yes I promise this post is about food.  After doing my due diligence I discovered that my new girl crush BFF lived in NYC, and she and her husband make amazingly delicious cupcakes!  I also discovered that the Robicellis were writing a cupcake book!  I immediately jumped on Amazon and pre-ordered myself "Robielli's: A Love Story, With Cupcakes: With 50 Decidedly Grown-Up Recipes."

I waited an agonizingly long time to receive my book, and in the mean time I managed to make it out to NYC to actually try a Robicelli's cupcake.  It was worth it.  Delicious.   I had done my research and found a place called Cake Shop that carried the cupcakes and made sure it was the first stop on my list of places to visit. 

 
The Chocolate Cannoli: 
Chocolate cake, cannoli buttercream, cannoli shells, chocolate chips.

Hands down one of the best cupcakes I've ever had, and it made me so excited to receive my new cookbook.  And then finally, it arrived!

I opened the book and was happily surprised to find that it's written colloquially.  It's like Allison and Matt Robicelli are in my kitchen talking to me while baking.  Their tips and tricks, as well as "half assed corner" are delightful and easy to read.  It is hands down the most fun cookbook I own.  I read through the recipes and picked my first cupcake...The Pumpkin Spice Latte.  

 Mini Pumpkin Spice Latte cupcake with my awesome new book.

After my lovely cupcakes came out of the oven I took to the Twitter-verse and shared my first batch with the world, and @Robicellis.  I was quite pleased to discovered that @Robicellis is very active with their Twitter account and happily re-tweeted me.  It was then and there that I decided that I would bake every single recipe from the Robicelli cupcake book.  

So far I have baked:

Chocolate Peanut Butter Pretzel Cupcake - Chocolate coffee cupcake with Peanut Butter Buttercream Frosting, and Chocolate Ganache.

The Noah Cupcake - Apple Cupcake with Goat Cheese Buttercream Frosting, Bourbon Brown Butter Sauce and Candied Bacon.

The Betty White Cupcake - Brown Sugar Sour Cream Cupcake with Cheesecake Buttercream Frosting and Lingonberry Jam.

The Root Beer Float Cupcake - Chocolate Root Beer Cupcake with Vanilla Buttercream Frosting and a Root Beer Custard filling.

The Liddabit Cupcake - Chocolate Coffee Cupcake with Salted Caramel Marshmallow Buttercream Frosting, topped with Salted Caramel Sauce and Peanuts.
 
Each recipe is broken down into the different components of the cupcake.  At the end of the recipe is a section called "Assembly" which is super helpful because it helps to finish off your cupcake and make it look amazing.  I've also discovered that the recipes work great for making mini cupcakes, which is my preferred size of cupcake.  Each recipe makes two dozen regular cupcakes, and 48 mini cupcakes - just take 5 minutes off the bake time and you're good to go.  I've started making the cupcakes in batches of one full size dozen and two dozen mini cupcakes.

My personal cooking challenge to myself is to bake every single recipe in the book and tweet out the picture.  I've already baked six different flavors and can hardly wait to bake more!  Every few recipes I'll upload my pictures.

Keep your eyes peeled! 


Saturday, August 24, 2013

Goat Cheese Creme Brulee!

Bob and I really like creme brulee.  Once we had a delicious goat cheese creme brulee and we both thought, if only we could make this at home!  And now we have.

First I went out and bought a sexy kitchen torch.  I spoke to a nice gal at Sur La Table who told me she very much liked the one I ended up purchasing.  (Yes, I believe her.)


I used the Chavrie recipe, which strangely doesn't tell you how hot the oven should be.  I went with 275 degrees.  I also went ahead and halved the recipe because I didn't think we needed to be eating that much creme brulee all by ourselves.  It was really straight forward and easy, just took a long time to finally get around to eating it.  And of course, it wouldn't be complete with out fresh strawberries!


It was so good! If you like goat cheese and you also enjoy creme brûlée you should definitely check this out.

:)M

Sunday, August 18, 2013

Cinnamon Bread!

 My First Loaf of Cinnamon Wheat Bread!

I decided to try my hand at making homemade bread.  Of course being me, I couldn't make just regular bread.  I chose cinnamon wheat bread because whenever I buy it at the store it has raisins in it, and there's never enough cinnamon.  Because I've never made bread I looked up a recipe, but then of course I used it as a guideline and adjusted as I saw fit.  I used The Pioneer Woman's Homemade Cinnamon Bread.

The alterations I made were:

  • I used brown sugar in place of white sugar for 1/3 of the sugar in the recipe.

  • I weighed out the 3.5 cups of flour based on this conversion chart. (I also weighed the sugar.)

  • I used a very generous amount of cinnamon and sugar in the swirl part.


I should also mention that I don't have a bread maker, so I made my bread entirely by hand - well my kitchen aid mixer did make an appearance.  It was a long endeavor.  I now have seriously respect for people who regularly bake their own bread - especially with out a bread making machine.  The whole process took forever, this is not a quick pay-off recipe.  I didn't get any pictures during the whole process because I was covered in nastiness for most of the cooking experience, but my finished pictures make me very happy.

My loaf of bread sliced open for delicious eating.

You can't tell very well but I didn't roll my bread tight enough so it didn't quite hold together in some places.  I think I'd also use half wheat flour and half regular flour to make the bread a little less dense.  Otherwise I was pretty damn pleased with myself.  

This morning for breakfast I used the bread to make french toast!  It was delicious!
Delicious French Toast!

I think everyone should try baking bread at least once just to understand how ridiculously long the process takes.

Now go forth you baking fools, and create your own deliciousness!!

:)M

Thursday, August 8, 2013

"Better With Bacon" at SF Cooking

 
    Cheesy Poofs stuffed with bacon and  
            served with pickled shallots.

I've loved all my cooking classes with SF Cooking, and because I've loved the classes I really wanted to share the experience with my husband, Bob.  So I did what any loving wife would do and I signed us up for a class all about bacon. It was great!
"Better With Bacon" was a little more intense than some of the other classes I've taken but it was completely worth it.  It was a full class of 14 people and we made: bacon wrapped dates, cheesy bacon poofs, blue cheese wedge salad, roasted pork belly, pork burgers, bacon biscuits with maple butter, bacon jam, and salted caramel pudding with bacon peanut brittle.
Bob made the salted caramel pudding, I made the cheesy poofs, and our teammate LeeAnn made the bacon brittle. We had a great time and at the end of all our cooking we sat down and enjoyed the fruits (pigs) of our labor.
            My plate of deliciousness.

     Salted caramel pudding with bacon 
                     peanut brittle.

You'll notice I don't have a picture of the bacon wrapped dates, because they were that good.
I'm happy to share the recipes with anyone who would like a copy.
:)M

Friday, August 2, 2013

An Italian Feast


Delicious vegetarian lasagna, spicy pork meatballs, and caprese salad. Photo courtesy of Winnie Lim

I recently ended up with almost 40 Roma Tomatoes in my refrigerator.  I decided this was my chance to make my own pasta sauce and then create other amazing things with that pasta sauce, and I did.

First I made my pasta sauce, and my goodness was I pleased.  I've included my basic recipe at the end of the post, along with the caprese and lasagna recipe.  I then decided that we couldn't use this wonderfully delicious sauce on spaghetti, no it deserved more than just spaghetti, it deserved an audience who would truly appreciate its texture and bite.  So I decided I would make lasagna!  But wait, I wanted to invite over my vegetarian friends too, so I decided to make vegetarian lasagna!  But wait (again), I also really like meat so I decided to also make spicy meatballs!  And so it was that I had a dinner party with: vegetarian lasagna, spicy meatballs, caprese salad, cheesy bread and the remnants of my coffee toffee cheesecake and a bread pudding....because well because I wanted one.

I made pretty much everything myself minus the bread and the spicy sausage.  I purchased all my bread from Whole Foods, and used the New York Spicy (HOT) sausage.  And then I just basically followed this recipe I found online for how to make the meatballs.  The recipe says it feeds 4 people.  I used my meatballs as a supplement and fed 6 meat eaters.  I used my extra homemade pasta sauce with the meatballs and it was great.  I will say that next time I'll probably buy ground beef and spice it myself.  The pork was good, but a little weird, as traditionally it's beef in pasta sauce.

My spicy pork meatballs! (Before going in the oven.)


My homemade pasta sauce:


This makes about 44oz of sauce.

  • 15 roma tomatoes

  • Cherry tomatoes (optional - however many you'd like)

  • 1 clove of garlic

  • 1 shallot

  • 2 tbsp olive oil

  • Salt and pepper

  • Dried chili flakes (optional)

  • Sugar (1-4 tbsp)


Pre-heat your oven to 450 degrees.

Cut your roma tomatoes into quarters, chop up the garlic into large chunks, and dice your shallot.  In a large roasting pan, or on a cookie sheet add your tomatoes, garlic and shallot.  Pour your olive oil over the top of your delicious chunks of veggies.  Add however much salt and pepper you enjoy, and add the chili flakes now if you so desire.  (1 tbsp of chili flakes will give you a little bite, 2+ tbsp makes it nice an spicy.)  Stir everything around to make sure it's coated nicely with the olive oil and spices.  Now throw it in the oven!

Yummy roasted tomatoes, garlic and shallots! 

Don't worry about covering it, you don't need to.  Leave it in the oven for 25 minutes.  After you let your veggies cool, throw them in your food processor, or blender and blend it up.  This is where the sugar comes in, add a little bit of sugar at a time to get the right balance of sweet to acidic.  If you taste your sauce before adding sugar you'll notice it's very tart/acidic.  The sugar will cut the tartness, I ended up adding about 2 tbsp of sugar to my sauce and I did it a little pinch at a time and then would blend between adding more sugar.  This part is really up to you, because only you will know how sweet you like your pasta sauce.

Super easy caprese salad.

Caprese Salad:


Feeds about 6 people as a side salad.

  • 1 cup chopped up fresh spinach

  • 4 heirloom tomatoes (med/lg sized)

  • 10 baby heirlooms, or cherry tomatoes

  • Mozzarella Cheese (shredded, cubed, whatever and as much as you'd like)

  • Pepper


Chop up your tomatoes into 1/2 sized chunks. Add your spinach, tomatoes and mozzarella to a bowl, add some pepper for zing and toss the crap out of everything!  No dressing necessary and it's delish!

Extra tip:  If you tear up your spinach into smaller pieces it will more evenly disperse throughout the salad.

My pre-cooked lasagna.

Lasagna Recipe:


Feeds about 12, if you follow the recipe.  Mine served 9 because I used a smaller pan (9 3/4 x 9 3/4).

My mother-in-law, Leslie, uses this really great recipe for lasagna so I used that as a base.  The recipe is great because you don't have to pre-cook the noodles!  Hoorays for one less pot to clean.

So I know you can read, which why I'm just going to tell you what I changed with the recipe.

  • Adjustment 1 - I used 1.5x the cheese mixture, because everyone loves cheese.

  • Adjustment 2 - I shredded up a mixture of zucchini, portabello mushrooms and onion in place of the spinach or meat.  (3 zucchinis, 1 portabellos, 1/2 onion - about 12oz of mush)

  • Adjustment 3 - Homemade sauce.

Extra tip:  Follow the directions and use a normal sized pan, it'll save you the grief of breaking the noodles to make them fit.


I'll write up how to make the bread pudding in another post.  Now be free and enjoy your foods!

:)M


Thursday, August 1, 2013

A View of SF with Brunch!


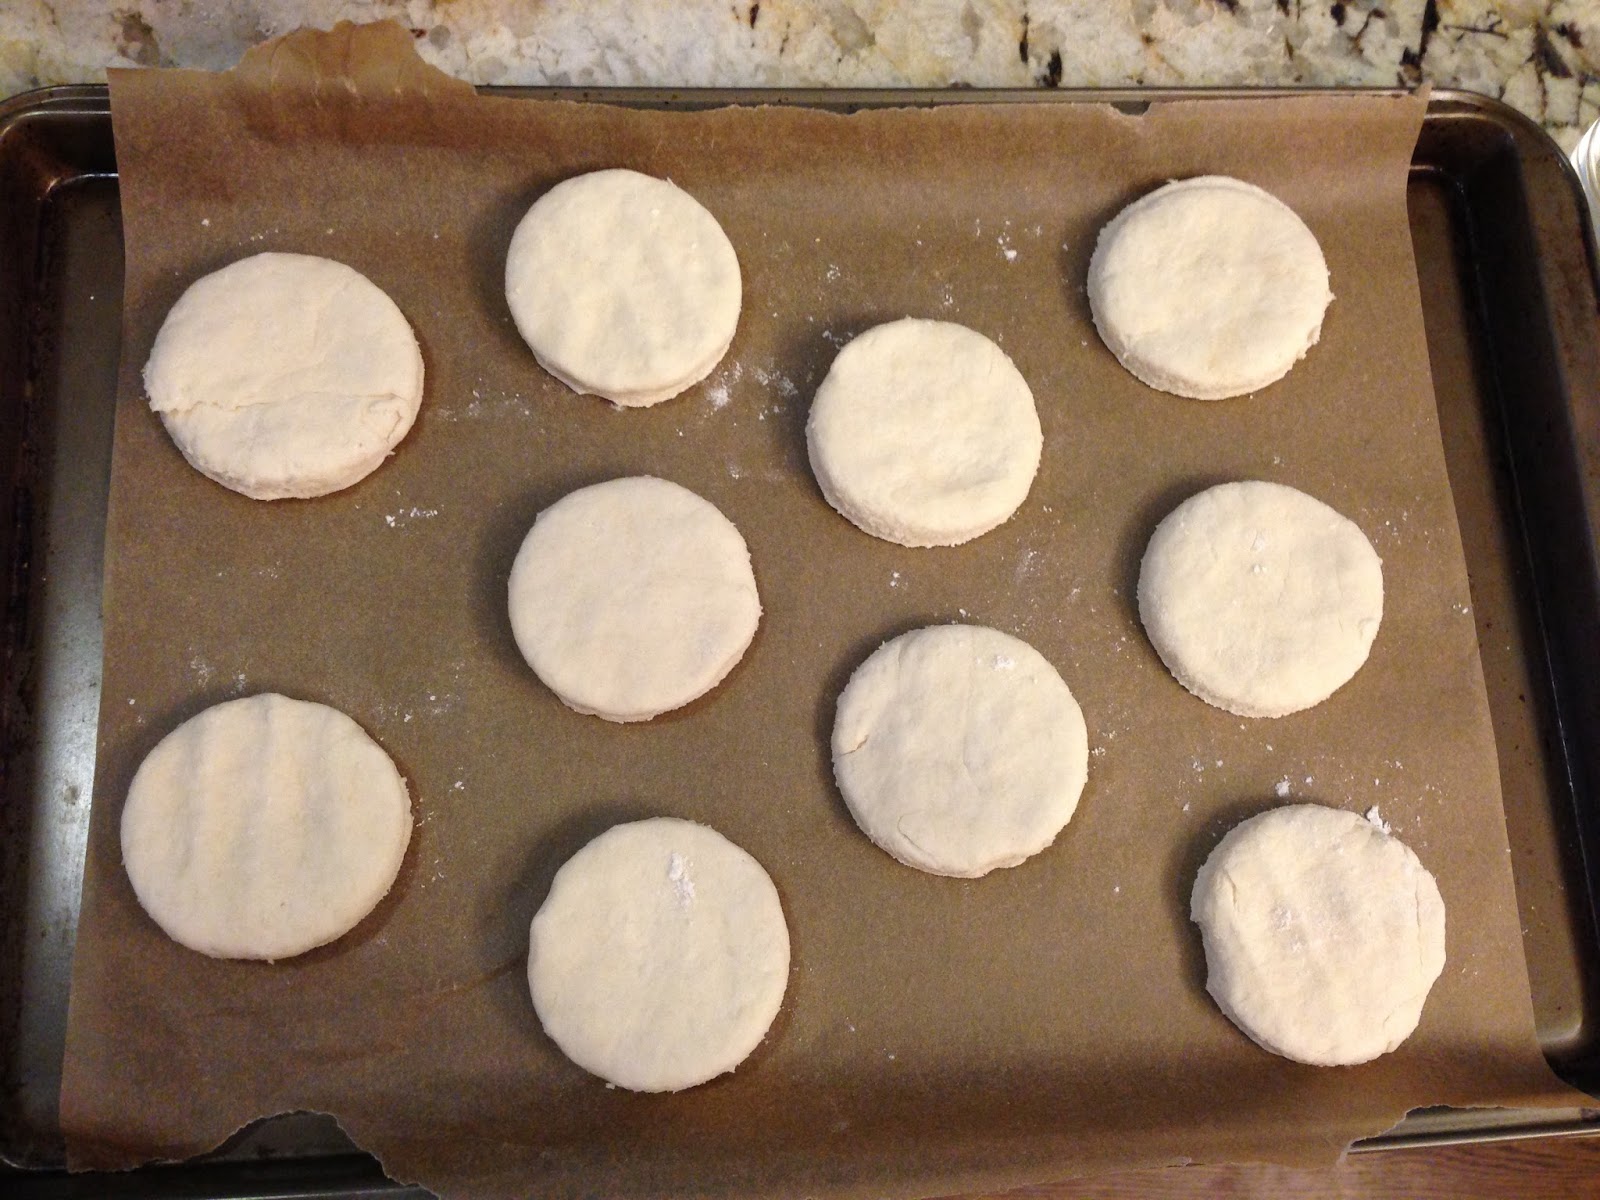
I had an overwhelming desire for buttermilk biscuits this morning, but also knew I had egg whites that needed to be used. What's a gal to do with a dilemma like that? So I made brunch.

The biscuits are really easy to make. I have a great recipe from SF Cooking for buttermilk biscuits and they come out perfect every time.  I'm including the recipe at the end of the post.

I had leftover egg whites (3) from making bread pudding and wanted to put them to good use.  I used the egg whites, one egg, and some yummy veggies I had in the fridge.  (Recipe at the end of post.)

And because it was brunch I went ahead and made smoothies!  We had extra strawberries and bananas in the house so I also put those items to good use.

And, as Emeril says, Bam! We had brunch.  And it was fantastic.

Buttermilk Biscuits Recipe:


Yeilds about 20 biscuits

  • 2 cups flour

  • 2 cups cake flour

  • 1 tbsp salt

  • 1 tbsp baking powder

  • 1 tsp baking soda

  • 1 cup butter (chilled, cut into ½in cubes)

  • 1½ cups buttermilk

Preheat the oven to 425 degrees.

Mix the dry ingredients together in a food processor.  Add the butter cubes and pulse until you have a "grainy" texture. 

Put your grainy mix in a bowl.  Make a little well in the middle of your dry mix and add the buttermilk.  Delicately fold/mix until you have a sticky dough.

On a clean flat surface sprinkle some flour and then roll out your dough mixture.  I just knead it about a little bit, until it's not sticky, and then pat it down.  You want about ¾ an inch thick dough. Using a 2in circular cookie cutter, or whatever you have in your home (I used my water glass) cut out your biscuits.  Place your biscuits on a cookie sheet (w/ or w/o parchment paper) and place the biscuits in the oven for 15 - 18 minutes.

You can also brush the tops of your biscuits with more buttermilk and/or butter before placing them in the oven.  Brushing the tops will help get a more golden/crisp top.

And now, enjoy your delicious biscuits!  They're really great with home made sausage gravy.


Veggie Scramble Recipe:

  • 1 tbsp butter

  • 2 small zucchini

  • 1 portobello mushroom

  • 4 chunks of garlic

  • 1/2 an onion

  • 1 cup spinach

  • 1 tomato

  • 3 egg whites (alternatively you can use full eggs, I just happened to have egg whites.)

  • 1 egg

  • 1/4 cup shredded cheese (I like a nice mix of cheddar/jack)

  • Salt and pepper to taste

  • Dried pepper flakes (optional)


Place a skillet on the stove top on a low heat, and throw in your butter.  Chop up the zucchini, portobello, garlic, and onion.  Add your chopped veggies and stir everything around, go ahead and add some salt and pepper along with the pepper flakes if you like spice.  Turn up the skillet to about medium and saute the veggies.  Add the spinach about five minutes in, so it doesn't get too soggy.  While your veggies are sauteing chop up your tomato. When your zucchini is slightly translucent add the tomatoes and stir the veggies around.

In  a separate bowl mix your eggs together with a whisk.  Add a little bit of water and whisk some more to help fluff up your eggs.  Salt and pepper as you'd like.

In the skillet evenly spread your veggies and pour the whisked egg across the top.  Let the eggs set for a couple of minute and then stir all the ingredients together.  Cook until your eggs are almost solid and add your cheese and stir again.

And ta-da, you have a wonderful veggie scramble.  You can use any variety of vegetables you'd like in a scramble, it's ridiculously easy.


Strawberry/Banana Smoothie Recipe:

  • 1 cup plain yogurt

  • 1 cup fresh strawberries

  • 2 bananas

  • 1 cup orange juice


Blend everything together in your blender. It's that easy.

And then enjoy your wonderful brunch!

(Extra timing tip - Put your biscuits in the oven right after you start sauteing your veggies.  This way, everything will be ready at almost the same time.)

The next day we ate more veggie scramble, the rest of the biscuits, and some delish apple smoked bacon.  (Cause it was Bob's happy birthday!)


Wednesday, July 31, 2013

Coffee Toffee Cheesecake - The Results!

Ta-da! My beautifully decorated cheesecake.

So, if you'll recall, I was making my first ever cheesecake just the other day.  Great news!  The coffee toffee cheesecake worked out awesomely!  It was far easier than I could have ever imagined.  If I can do it, you can do it.  I swear.  The above picture is my cheesecake after it had cooled over night.  I added the chopped up Heath Bars all over it and then melted dark chocolate and piped a nice design - cause that's how I roll. 

Now, here's how you too can make a delicious Coffee Toffee Cheesecake.  I used the linked recipe with a couple of small adjustments, which you can read about in my original cheesecake post.

I seriously followed the directions other than the previously read/written about small adjustments which I couldn't help, because I'm lazy.

One thing I will tell you, that I didn't know about until I was making a cheesecake is that you MUST wrap your spring form pan with tin foil.  (Yes, even if your spring form pan has a bottom.)  I laughed at the idea of wrapping tin foil around my pan, but did it anyway because I wasn't sure.  I'm really happy I did wrap the darn thing because when I removed the foil and pan it was all sticky/buttery gross and that would have ended up all over the place.  The tin foil just helps you contain the mess.  I used two sheets of foil and made sure to wrap all the way up around the sides of my pan.

I'll also say that when/if I make my crust again I will pulse the crap out of those cookies to make the crust easier to spread and mold to the bottom of the pan.

This is a picture of my cheesecake right after it had come out of the oven, still in it's water bath.  (Yes, you need to use the water bath.  Do it.)


After my cheesecake came out of the oven I delicately removed it from the water bath - so it'll stop cooking - and placed it on the counter to cool.  When it had cooled completely I covered the top with foil (cling wrap tends to fall in on the top and make it look ugly.) and put it in the fridge for the night.  Yup, just leave the foil and spring form pan as is, there's no reason to remove it yet.

The next morning I pulled the cheesecake out of the fridge and removed all the foil and the spring form pan.  It's messy, be prepared.  I used a new piece of foil on the bottom of my pan so I could move the cheesecake around without getting everything else in my kitchen gross.  I had my Heath Bars already chopped into a fine powder and sprinkled it all over.  The recipe calls for 4 Heath Bars but you will be fine with 3.  I melted my dark chocolate (when you melt chocolate in the microwave you should do it in 30sec increments so you don't burn your chocolate, ever 30sec take it out and stir it around), and put it in a small ziploc bag so I could pipe a nice design.  I stupidly didn't wait for my dark chocolate to cool sufficiently so I tried to burn my hands off.

Here's a nice side view of my decorated cheesecake.


And finally, cut that cheesecake up and eat it! Eat it like there's no tomorrow!